There are a lot of URL Shortening services on web which you can use to shorten long URLs for sharing in social sites, but it is better if you have your own custom URL shortener for your blog or website.
Custom Short URLs like site.to/12345 or on.site.to/12345 look much better than that of boring, big URLs. Twitter automatically truncates the long URLs but Facebook and Google+ display the full URL when we post a link.

If you don't want to have a separate domain for creating URL shortener for your blog, you can also use a subdomain as a URL shortening domain. I noticed it when I saw a tweet from the newly launched site Recode, which had a short URL like **on.recode.net/12345**. It is basically a subdomain which is being used for URL Shortening.
I researched a bit and found how it exactly works. If you want to set up URL Shortener on subdomain, follow the steps below.
Things you'll need
Things you'll need is a domain, access to Domain panel to change DNS record. You'll also need a Bitly account, which is a free service for creating short URLs.
What we'll be doing is using Bitly's custom domain feature with the subdomain, so that we can use Bitly service with custom short URLs.
Setting Up Subdomain and Bitly
If you have been blogging for sometime, you may be knowing how to create a subdomain. To setup a subdomain, login to the site from where you bought the domain.
Now, you will have to open DNS editor or DNS records section and add a new CNAME record. Editing DNS records is a bit dangerous, so you'll have to be careful while adding a new record.
Scroll to list of CNAME records and add a new CNAME record with following credentials.
- Hostname - Use the Subdomain name in this field, like if you want a URL like "on.domain.com", then enter "on" in this field. You have to make sure that the subdomain should not be longer than 15 words including the dots.
- Points to - You just need to enter
**cname.bitly.com**in this field.
Once you enter the credentials, save the changes.
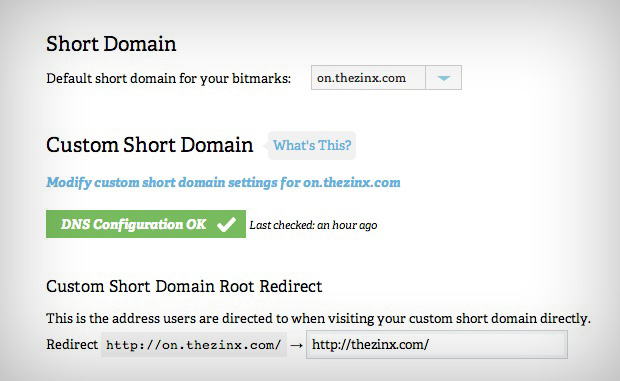
Now login into your Bitly account and navigate to the Settings page. You'll see Custom Short Domain option in Advanced tab, enter the full subdomain URL there, like "on.domain.com". Proceed as the site says and you'll end up with confirmation page. It may take sometime for Bitly to recognise the changes you made in the DNS records.
From now on, Bitly will be using your subdomain to shorten all the URLs.
Now, you will have to add Bitly integration on your WordPress blog so as to use your subdomain as URL Shortener instead of WordPress's wp.me URLs. For this, the best option is to download WP-Bitly plugin. This plugin automatically replaces all the WordPress short URLs with Bitly shortened URLs.
There's also an Official Bitly WordPress Plugin, but I recommend not to use that as it not only replaces the wp.me URLs with Bitly URLs, but it also replaces canonical links.
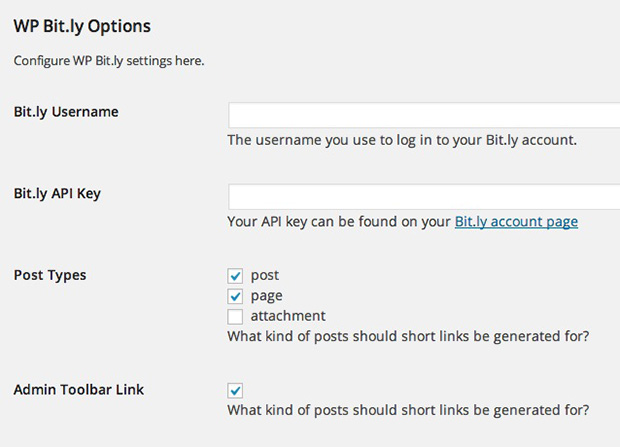
After downloading and activating the WP-Bitly plugin, navigate to the Settings > Writing page from your WordPress dashboard and scroll down to see WP-Bitly settings. You'll need to add your Bitly Username and API key there, which you can be found here.
Once you save the settings after entering the username and the API key, the plugin will automatically generate short URL for all your posts. If you use Jetpack's Publicize feature to automatically share new posts, then the WP-Bitly plugin will replace the default wp.me short URL with your custom subdomain based short URL.
By default, your subdomain will redirect to Bitly site. If you want it to redirect to your site, you can do this in Advanced tab in your Bitly account settings page.
You're done now!
You can also use this Subdomain based Custom URL Shortener with apps like Buffer, Dlvr.it etc. It will on any site or app where there's Bitly support.